Creating a Campaign
There are several ways to arrive at this page:
From the left-hand navigation menu:
- Quick Actions > Create a Campaign
- Campaign > Create Campaign
- or from Add a Campaign to a location from the Location summary page.
Campaign Name
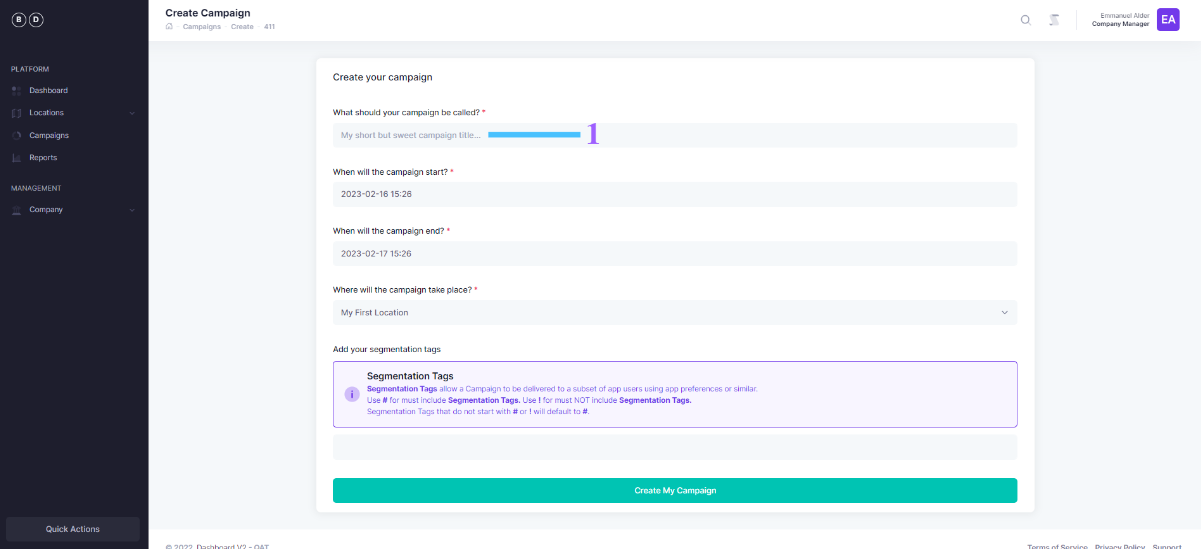
On the campaign setup page, being by naming your campaign.
- Enter a name for your campaign in the name text field provided. For example "Easter Egg Promotion", "Winter Sale Oxford Street"
Define the start and end time of your campaign
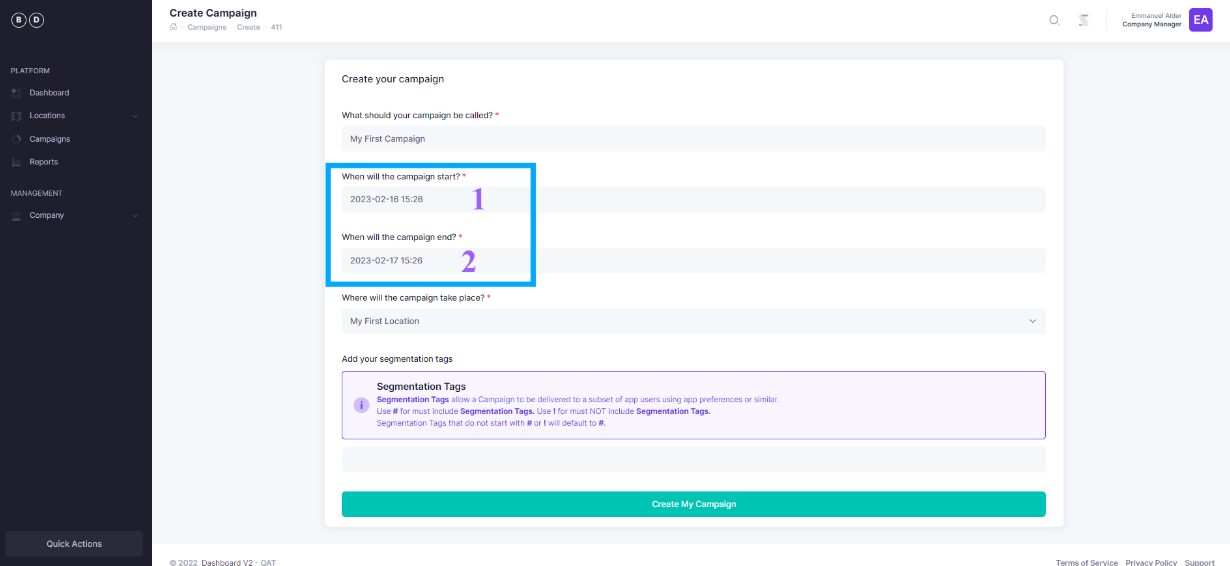
Next, you need to set the start/end date and time for your campaign.
Click the time and date field to display the time and date function
-
Click the campaign start time and date field to bring up the date and time selector
-
Click the campaign end time and date filed to bring up the date and time selector
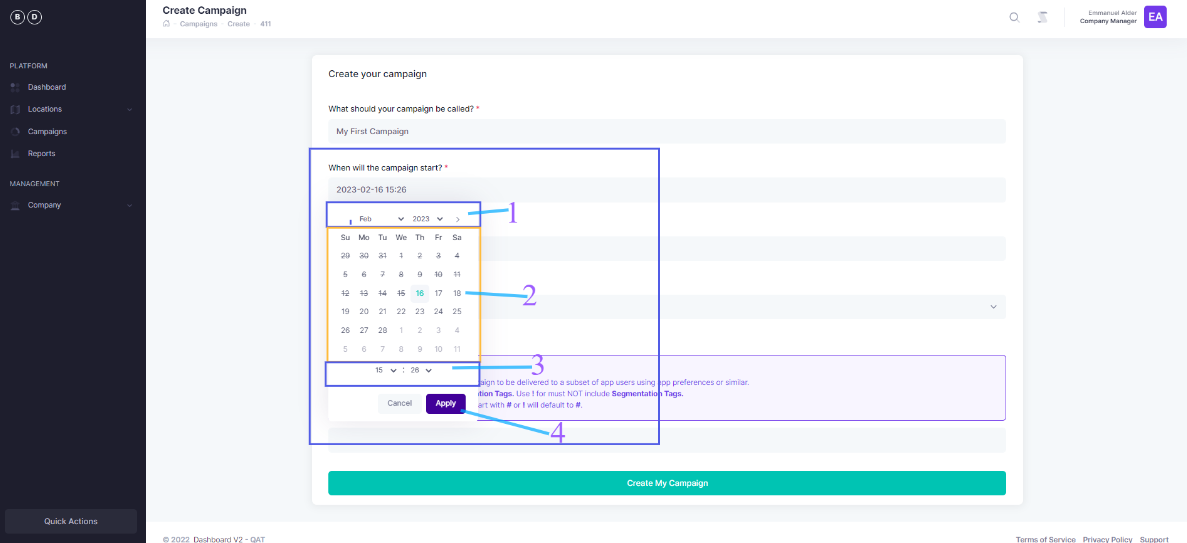
To set the start date and time, click on the date/time field, this will open the time/date picker. Select the date and time you want your campaign to start. Repeat this process when setting up the campaign end date and time.
-
Select the start month and year for your campaign
-
Select the start day and date
-
Select the start time for your campaign. Click the drop down arrows to display the times
-
Click the apply button to apply your changes
Assigning a location to the campaign
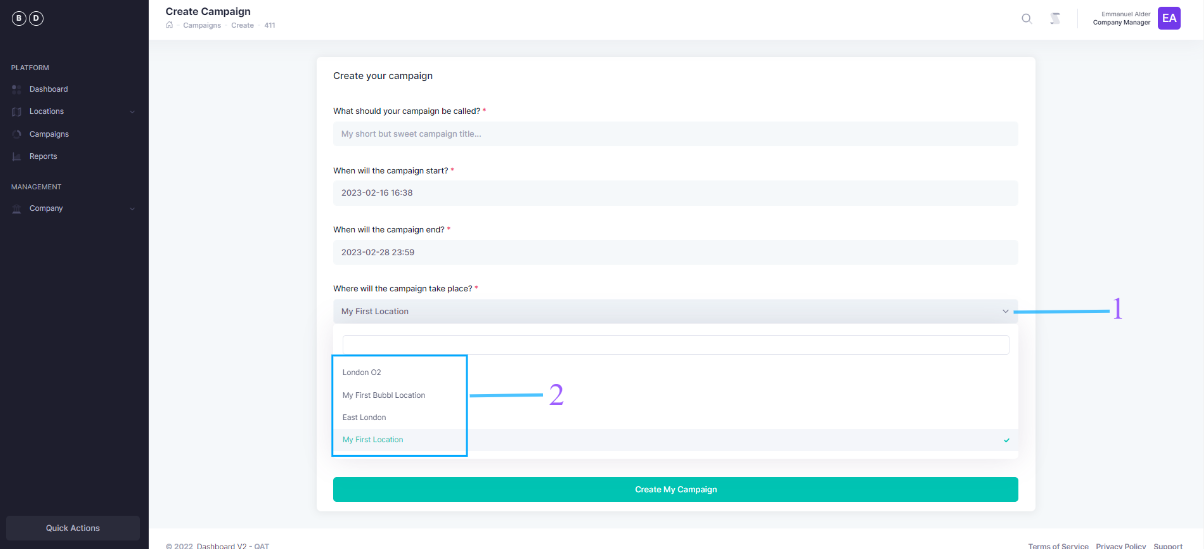
All locations previously created are available from the location dropdown menu. If this is the first time you are on this screen then this option will be blank and you will need to create your first location before you can proceed any further.
If you have navigated to this screen via "Adding a Campaign to a location" method then your location selection will already be pre-populated in this drop-down list.
-
Click the location drop-down menu to display available locations for this campaign
-
Select the location from the list provided
For each campaign you can only assign one location. However the same location can have multiple campaigns associated with it.
Segmentation Tags
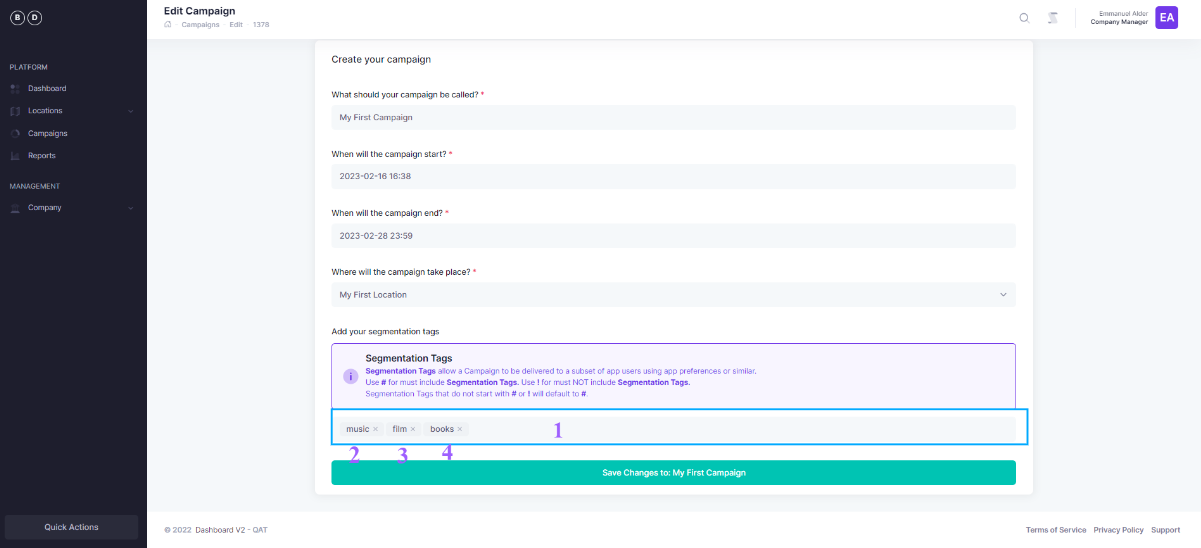
Please check with your IT department that the requisite work related to segmentation has been completed and that your systems are integrated with our plugin.
‘Segmentation tags’ allow a campaign/tools to be delivered to a subset of app users using app preferences or similar.
Click inside the segmentation tag field to begin entering tags. Use # for must include segmentation tag. Use ! for must NOT include. You can enter multiple tags. After entering the segmentation tag click the enter button and repeat process.
-
Click the segmentation input field to begin adding segmentation tags
-
Enter a tag in the segmentation field. Click the enter button on your keyboard to add the tag
-
Enter a tag in the segmentation field. Click the enter button on your keyboard to add the tag
-
Enter a tag in the segmentation field. Click the enter button on your keyboard to add the tag
Save Changes
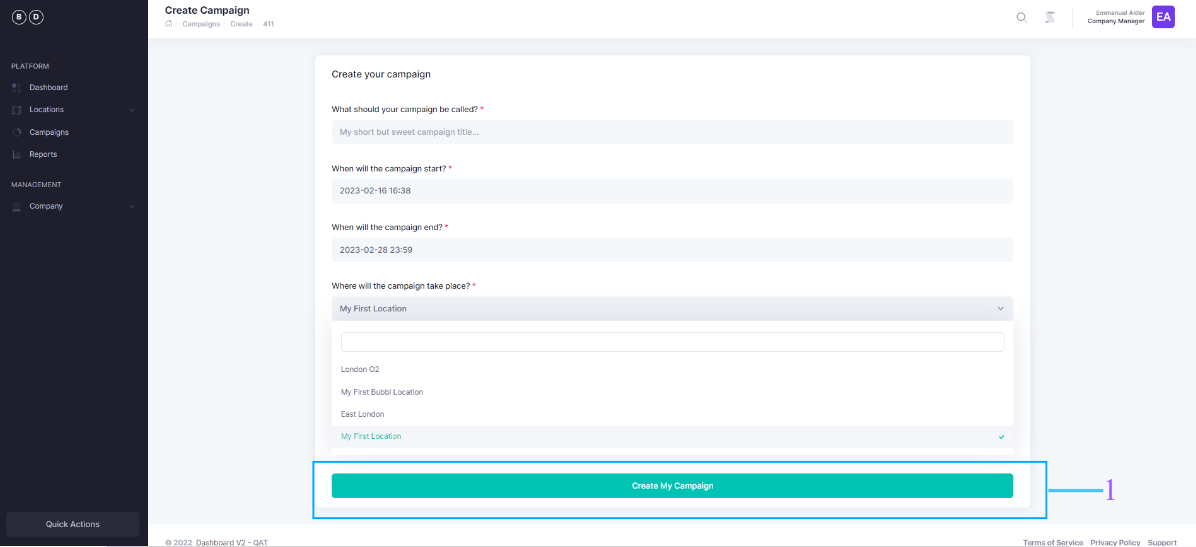
Once you are happy with everything, click the save button. You are now ready to start adding tools to your campaign.
- Click the create campaign button, this will navigate you to the tool setup page
Please Note:
Please note: When you set up your Campaign Duration, you are setting up the overall duration that he campaign will run. You can set up different times for your notification tools within this duration. For instance - you might set up the campaign to last a week BUT have a set of different notification tools that run within that set duration i.e. a lunchtime special that runs between 11am to 2pm Monday to Wednesday only.
Updated over 2 years ago