Footfall Report Analysis Editor
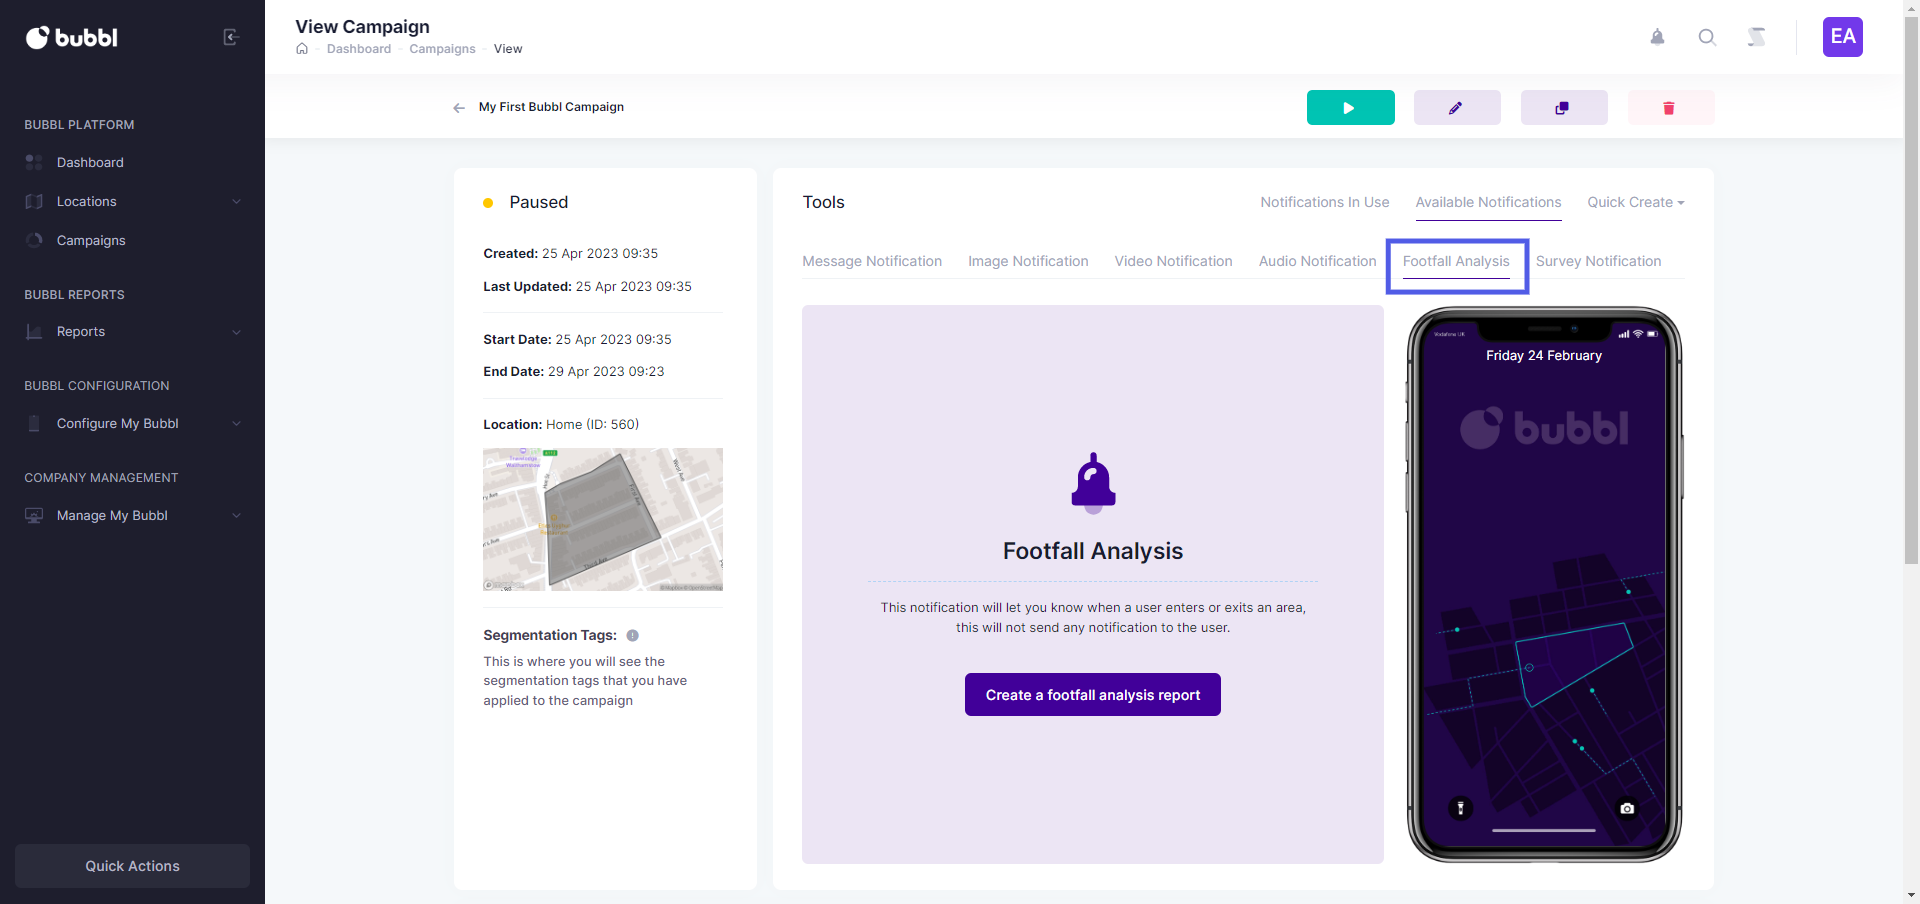
- Click the create a footfall analysis button
Name your tool
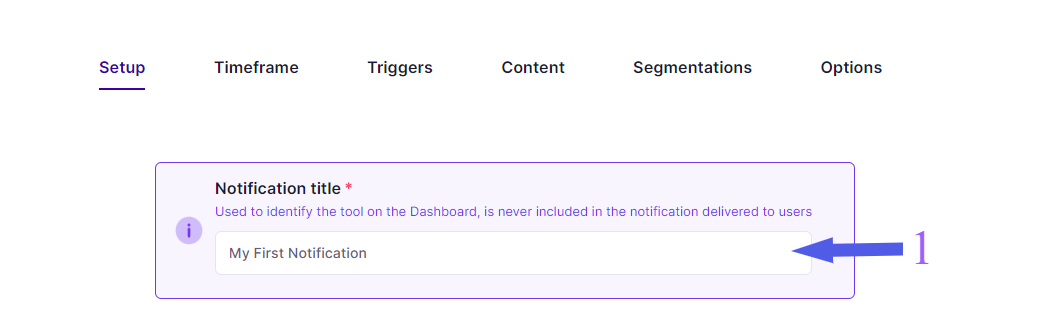
- Provide a name for your Footfall Analysis. This will not be displayed to app users.
Notification time

Select the notification timing options.
- You can set the notification to fire between a specified time range
- You can set the notification to fire at a fixed time
- After making your selection, click the continue button
Set notification start and end date and time
To set the start time for the Footfall Analysis, click the calendar icon. This will bring up the time and date picker.


Set the time and date you want the Footfall Analysis to start.
- Click the calendar icon in the start time field to bring up the date and time picker.
- Click the calendar icon in the end time field to bring up the date and time picker.
- Click the continue button to produce
To set the end time for the tool, click the calendar icon. This will bring up the time and date picker. Set the time and date you want the tool to end.
The Footfall Analysis start time can not be set to start before or after the campaign start date and time.
The Footfall Analysis end time can not be set to end before or after the campaign start or end date and time.
If you choose the Footfall Analysis to fire at a fixed time, there will be no end time to set. You only need to set the exact time you want your Footfall Analysis to fire.
Notification trigger state

Set the trigger action of when you want your Footfall Analysis to fire.
-
Click the 'user is inside location' button, if you want the notification to fire on entry
-
Click the 'user exits location' button, if you want the notification to fire on exit
-
Click the continue button to proceed
Segmentation Tags

Add the segmentation tags to target specific app users based on their preferences. Please note that this level of segmentation is in addition to the campaign-level segmentation.
-
Click inside the segmentation tag field to enter tags. Click the comma on your keyboard to save the tags. To add multiple tags, enter a tag, then click the comma, and then add another tag. Repeat this process until you have entered all yours
-
Click the continue button to produced
Test Mode
There is a toggle button that enables Test Mode for Footfall Analysis.

Please refer to Enhanced Interactions documentation - Testing Strategies
https://bubbl.readme.io/docs/testing-strategies#assigning-one-or-more-test-ids-to-a-campaign-tool
Should you enable Test Mode, you will be required to enter the test mode ID. Please refer to the developer documentation for guidance.

-
Click on the test mode field to enter the test mode bubbl id
-
Enter the test mode id.
-
Click the save button to save
Save your Footfall Analysis
Click the submit button to complete your Footfall Analysis creation.

- Click the submit button to add your Footfall Analysis to the campaign
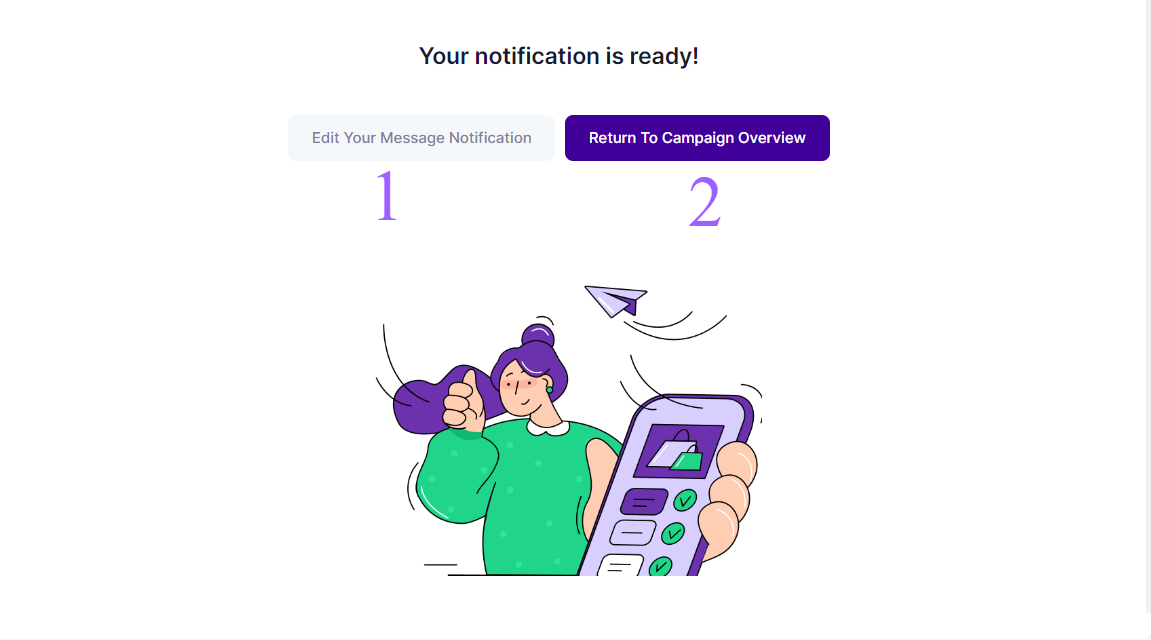
Footfall Analysis saved
If you want to edit your Footfall Analysis, click the edit Footfall Analysis button. If you are happy click the return to campaign overview button. You can start adding other notifications to your campaign.
-
Click the edit button to edit your Footfall Analysis.
-
To return to the campaign overview where you can add more notifications, click the return to campaign overview button.
Updated about 2 years ago