Campaign Locations (Geofences)
Quick Action - Create Location
To create a location (geofence), click the ‘Quick Actions’ button, then click on the ‘Create Location’ button. From here you will be taken to the map view where you can create your geofence.
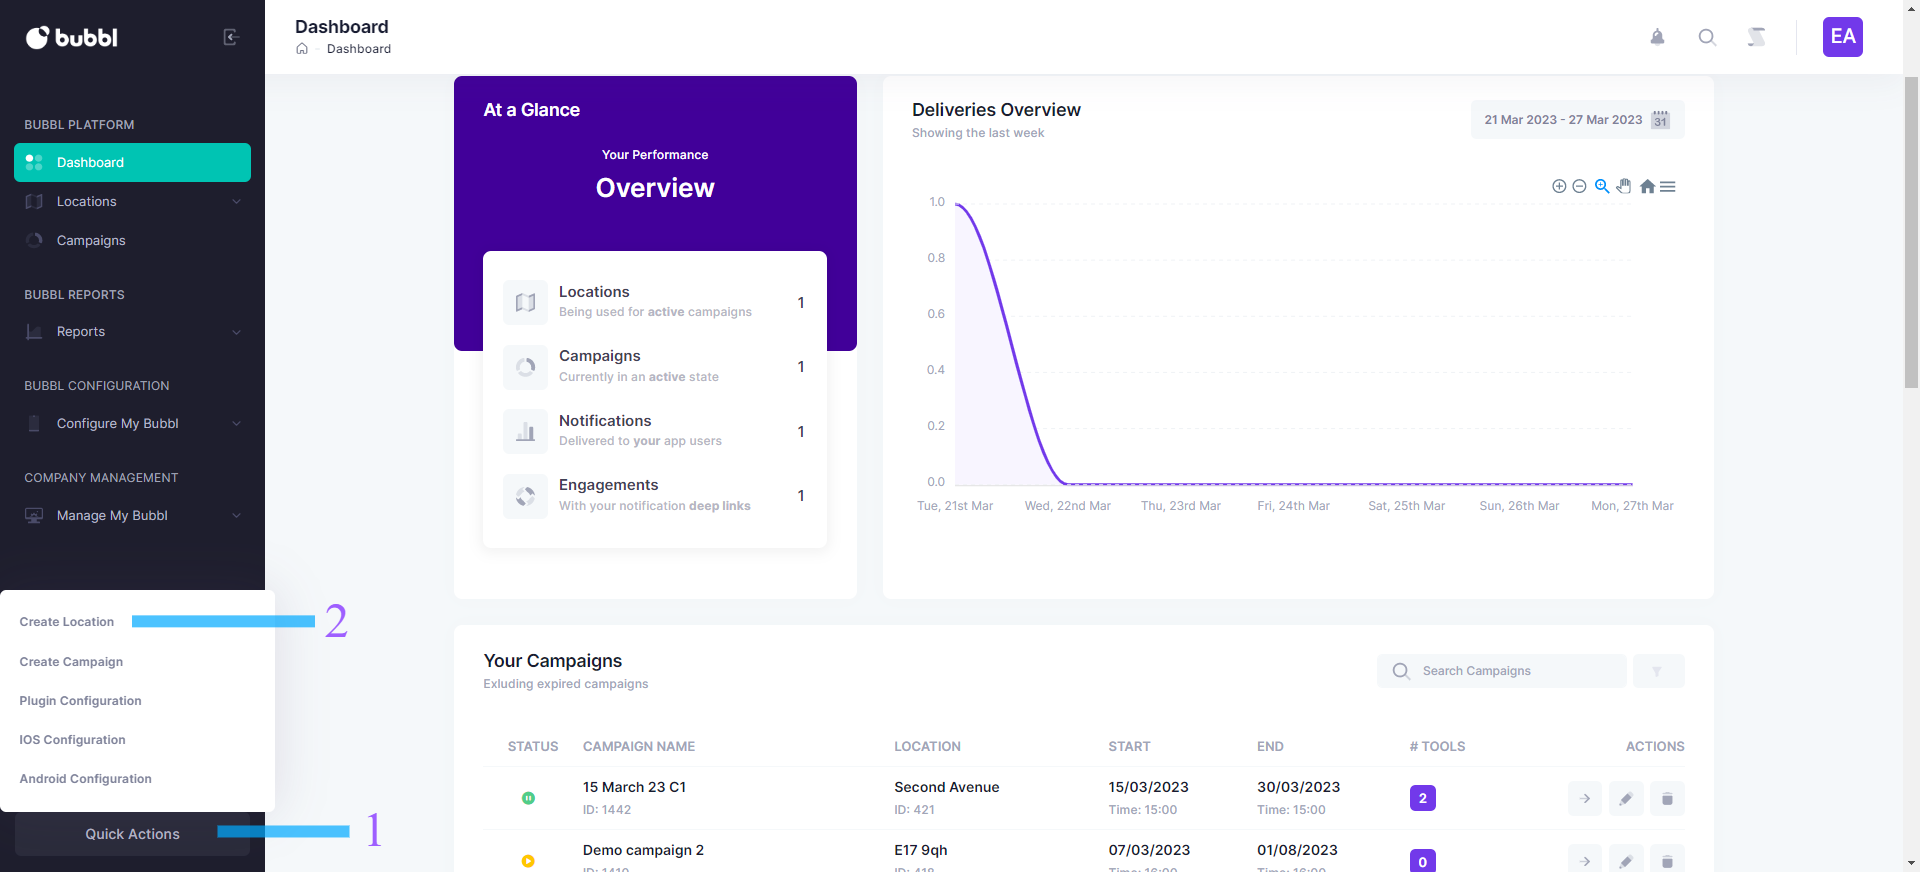
We have highlighted some of the key information on this screen for you to become familiar with the platform.
-
Click the quick action button to open the quick actions menu
-
Click the create location button to be taken to the create location screen
Location drop-down list
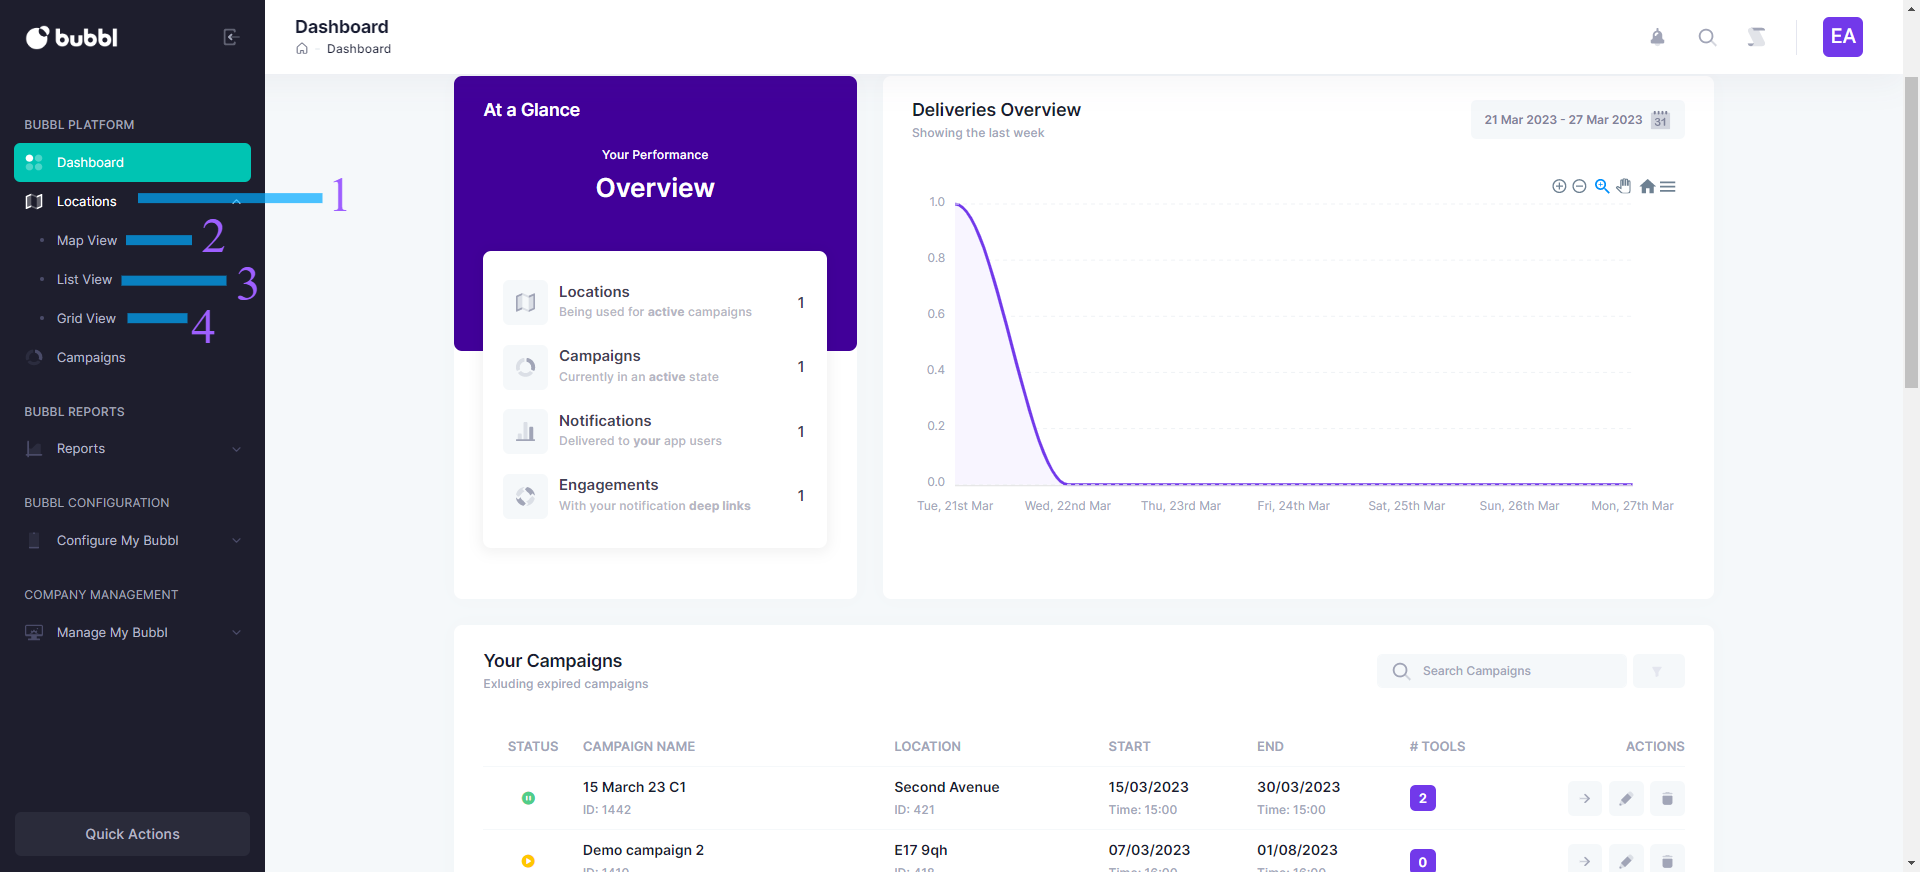
To navigate to locations, perform the following action on the left-hand navigation menu
-
Click the "location" option to expand the drop-down to reveal the following:
-
View as a map
-
View as a list
-
View as a grid
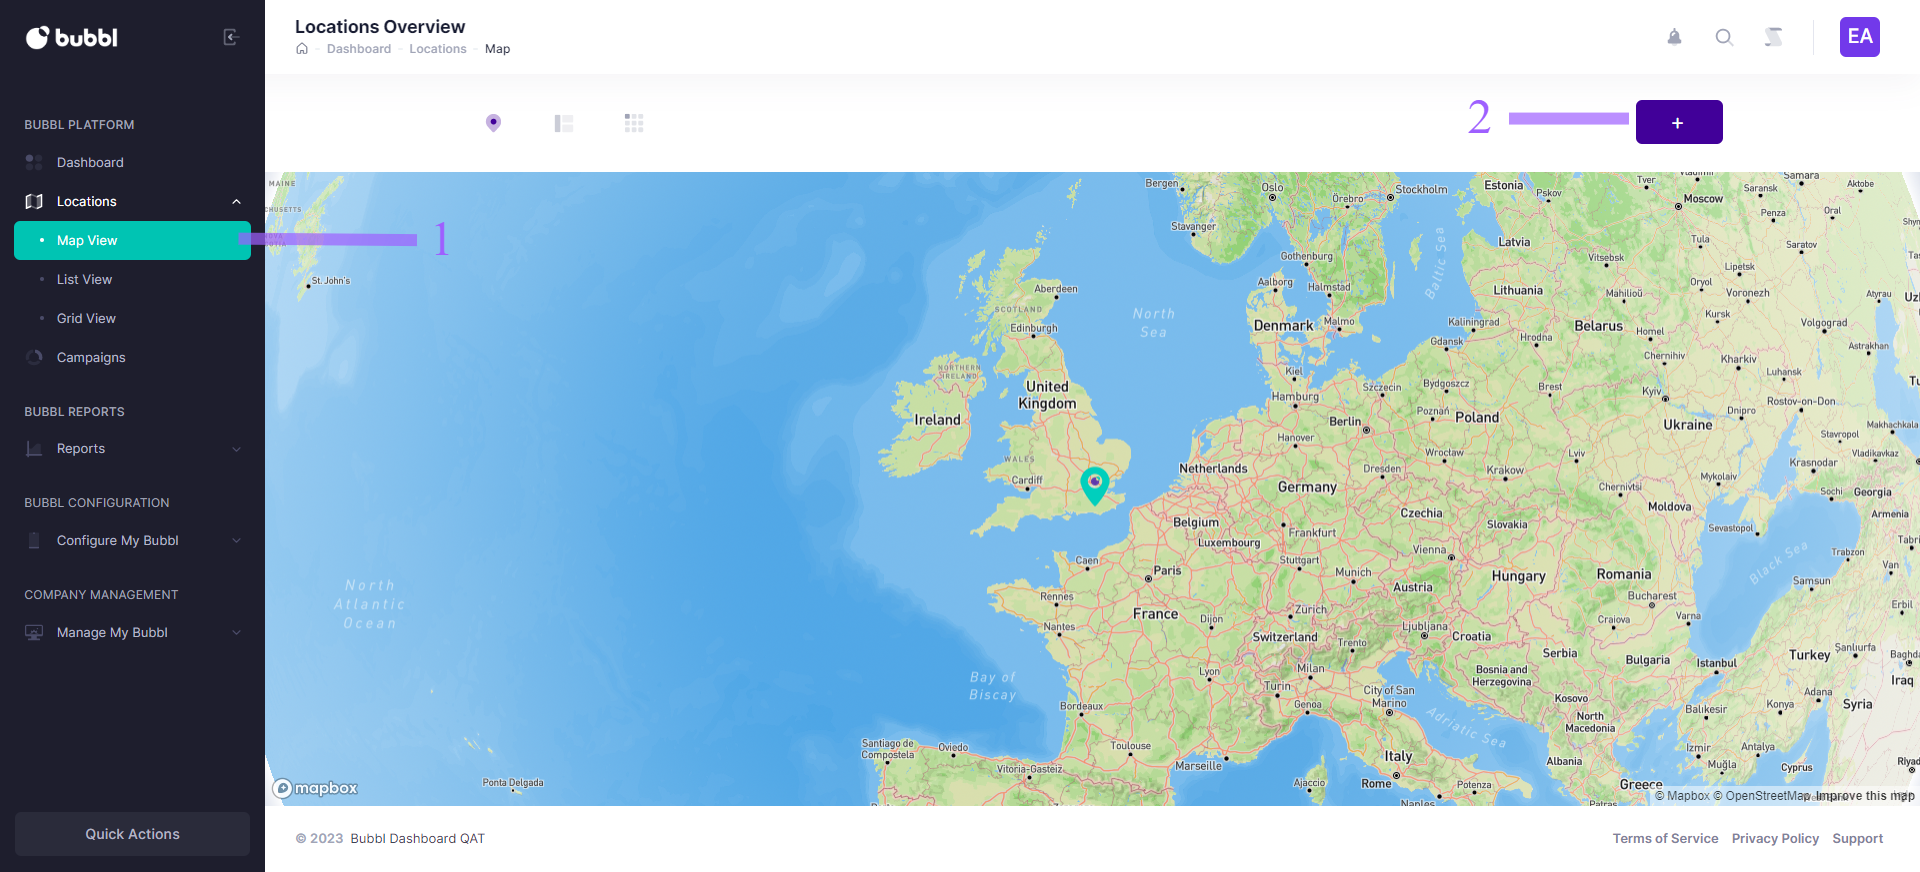
Map View
Click on "View as a map" from the left-hand menu to see all locations on an expanded globe.
You can zoom into this map using your trackpad.
(You can also toggle between views by clicking on the icons)
List View
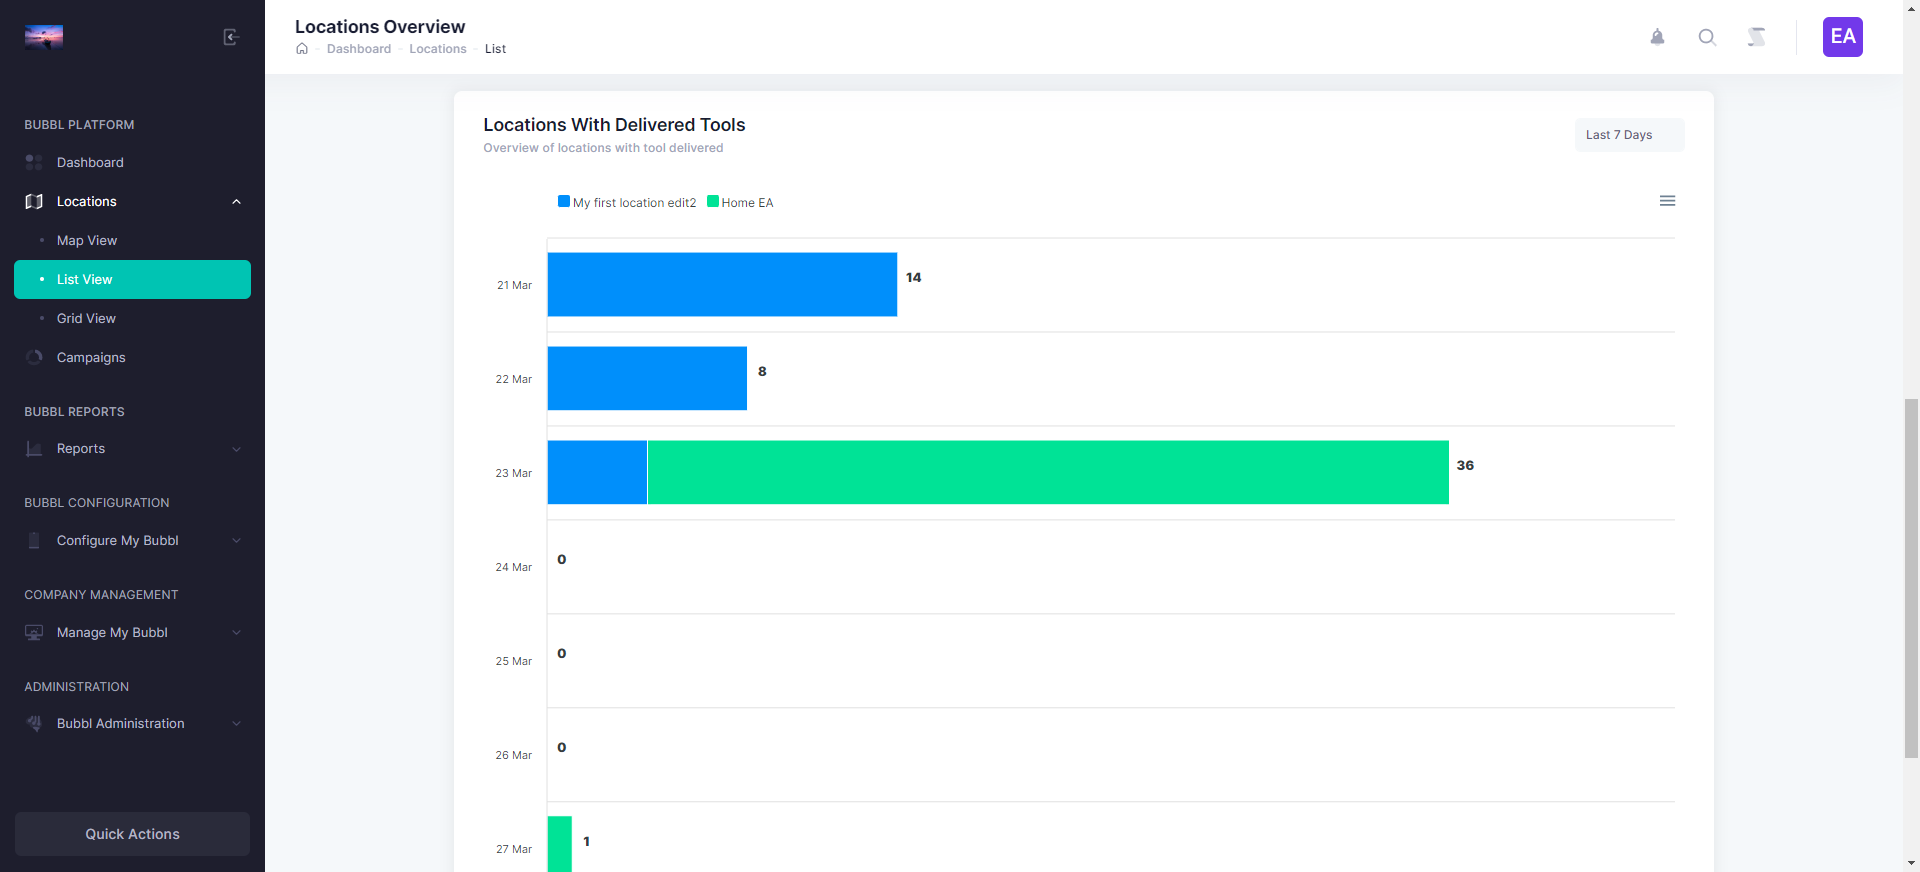
Click on "View as a list" from the left-hand navigation menu to display locations in the list view.
There is a search dialogue box at the top of the page for you to quickly search for existing locations on your account.
(You can also toggle between views by clicking on the icons)
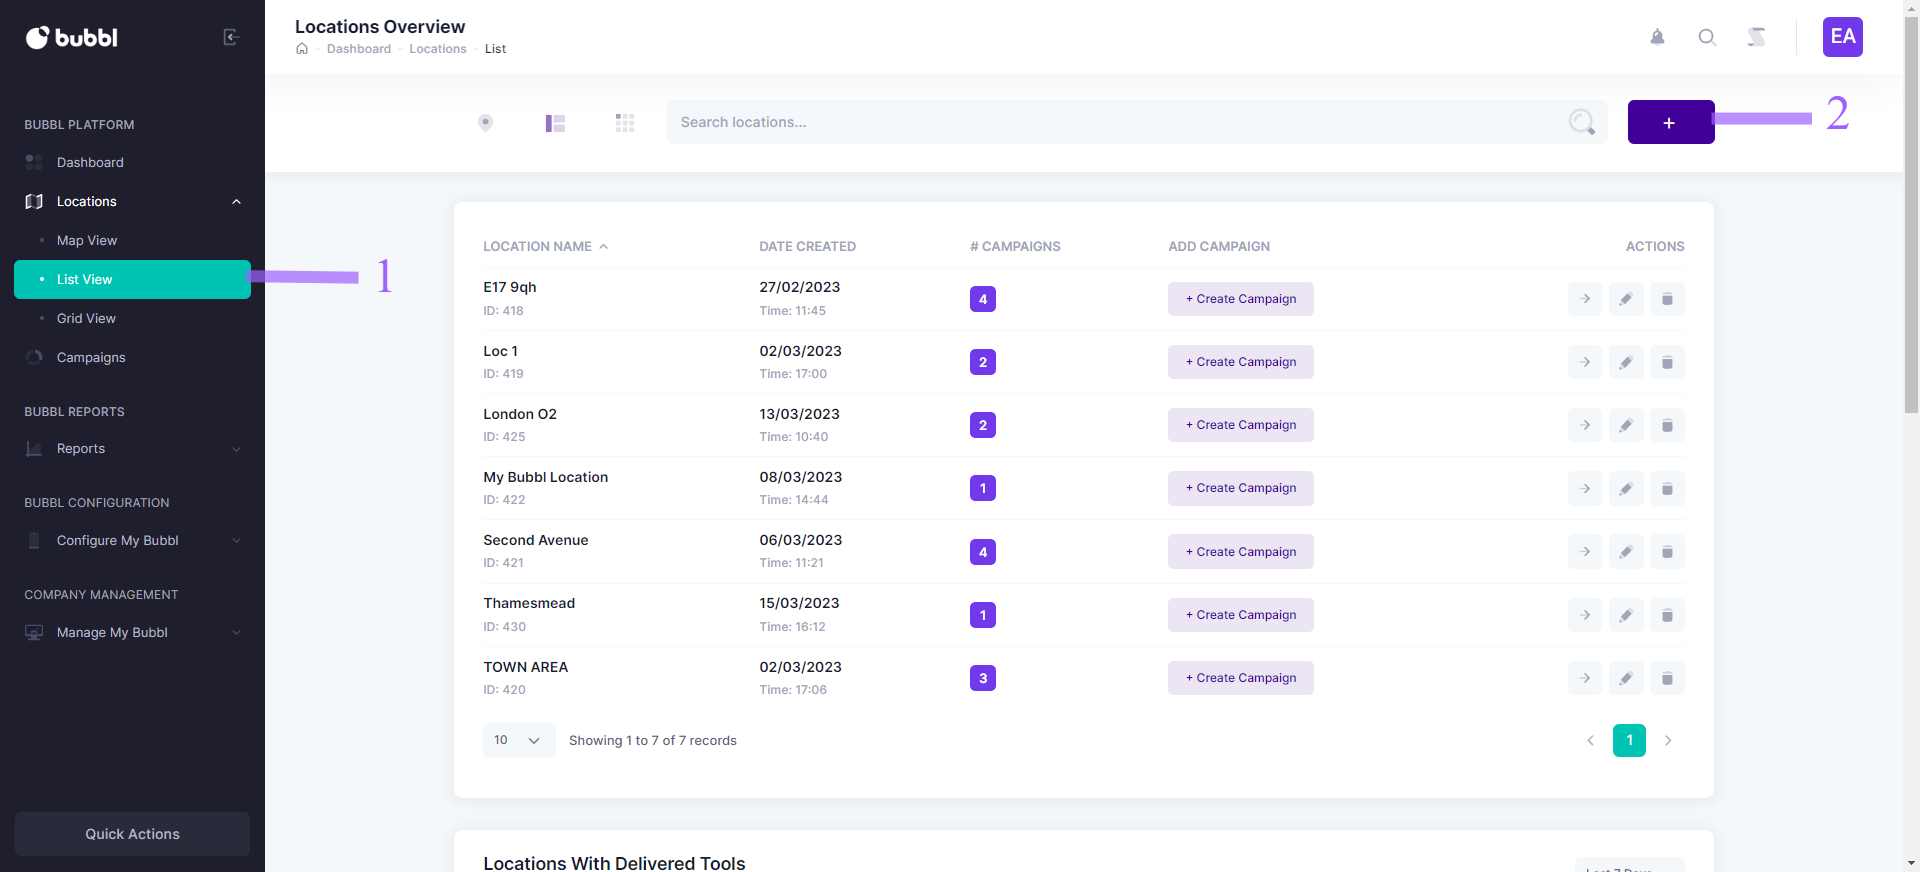
The Location with delivered graph displays all locations with notifications that have been delivered.
Grid View
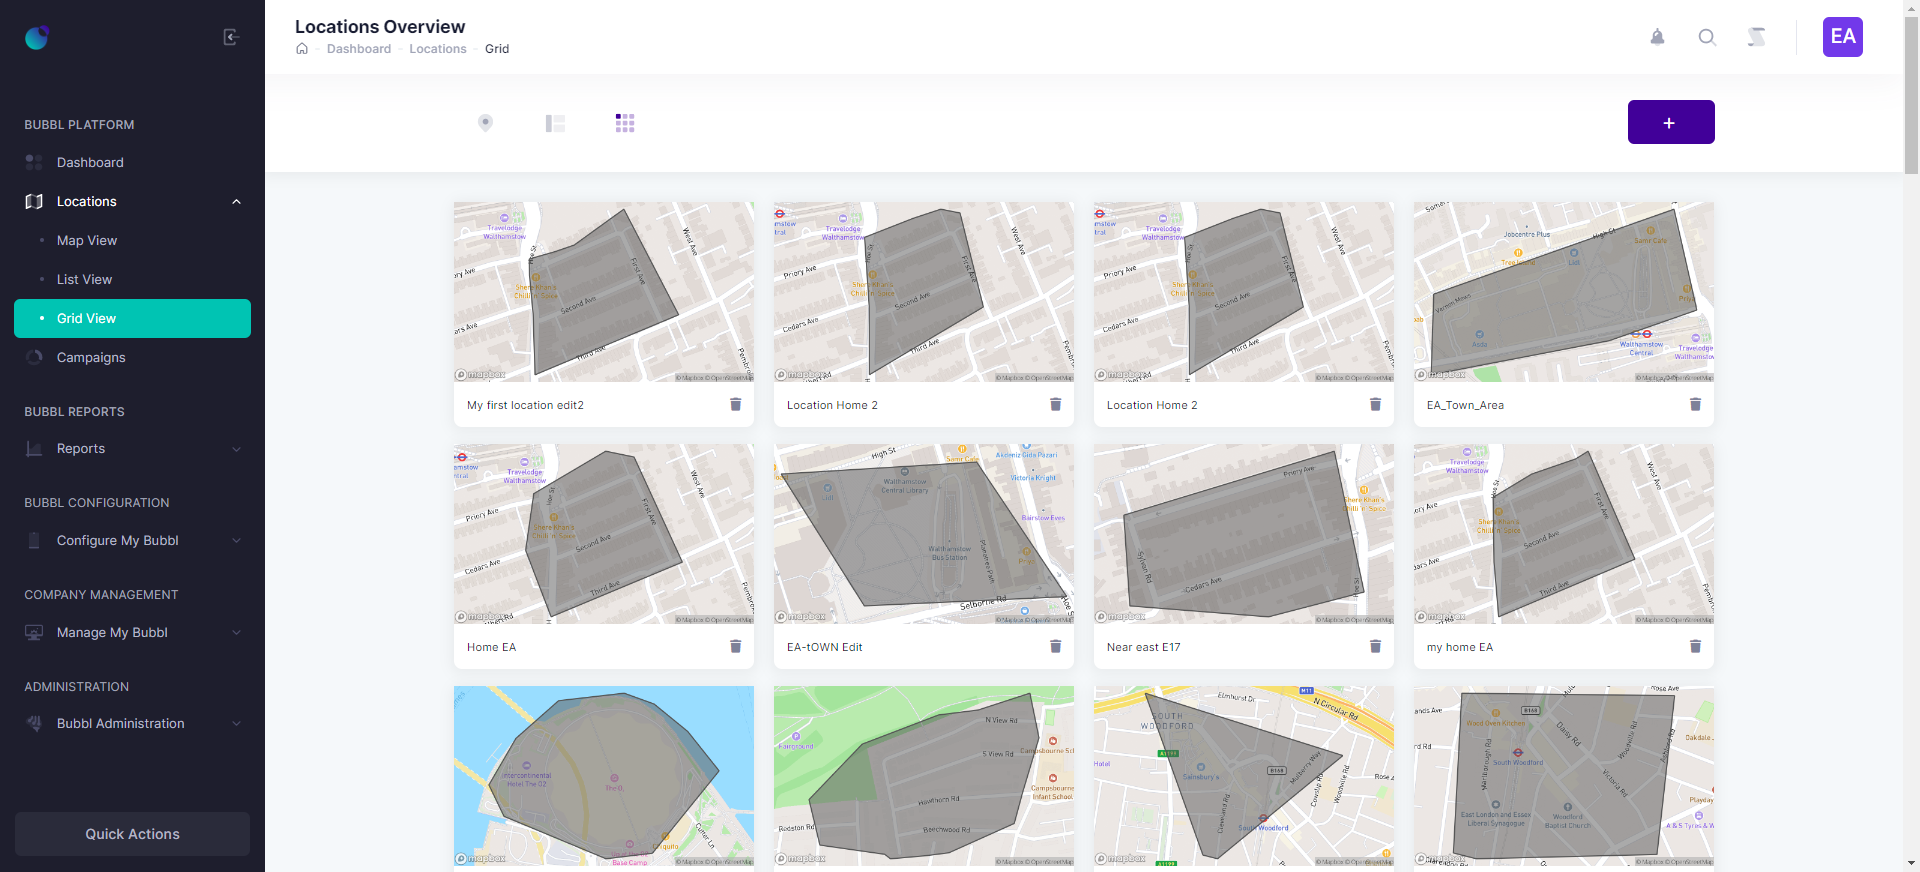
Click on "View as a grid" from the left-hand navigation menu to display locations in grid view.
The most recently created location is ordered last.
(You can also toggle between views by clicking on the icons)
Updated about 2 years ago