Creating a new locations (Geofences)
Drawing a geofence around a point of interest to create a location
To define your point of interest, In the search field, type in the postcode or address of the location you want to use. From the list of locations given, select the one you want. The map will take you to the point of interest you just selected.
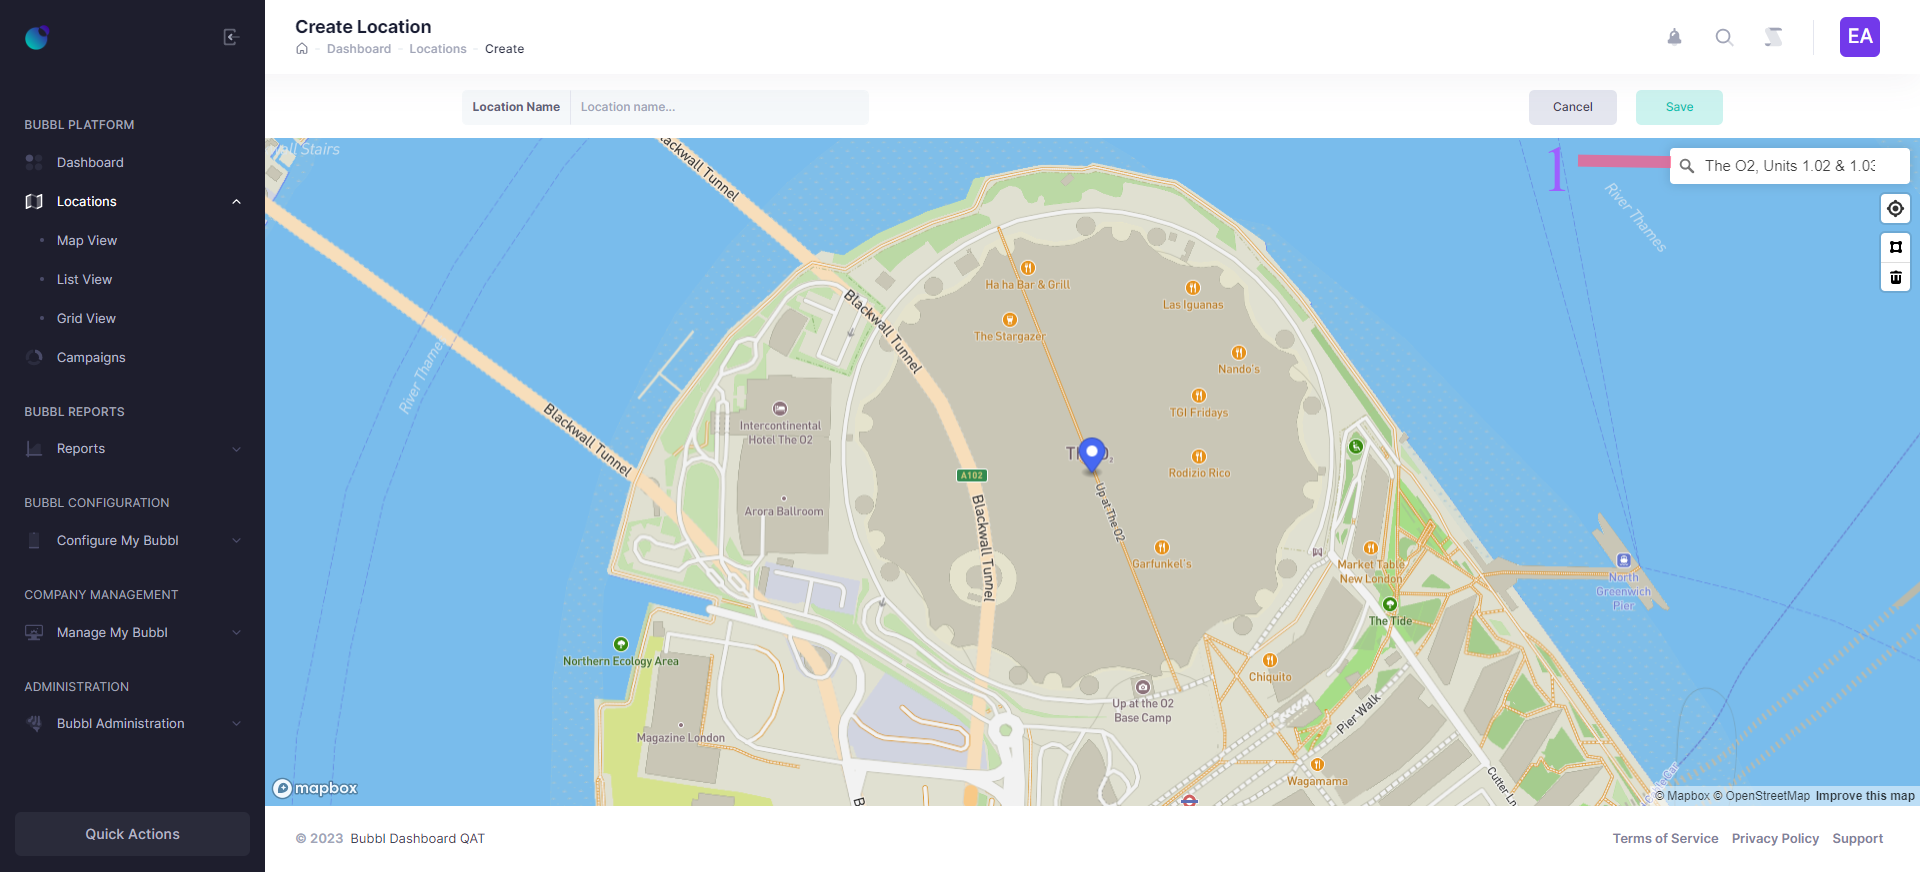
Once you have identified your point of interest, you are ready to create a geofence.
- Click the polygon tool icon to enable the draw function on the map. When you hover over the map, a black cross should appear. This cross indicates that you have selected the draw tool. If you hover over the map and a hand tool displays, this means that you are in navigation mode and can drag the map around. To change to the draw tool click the draw polygon icon
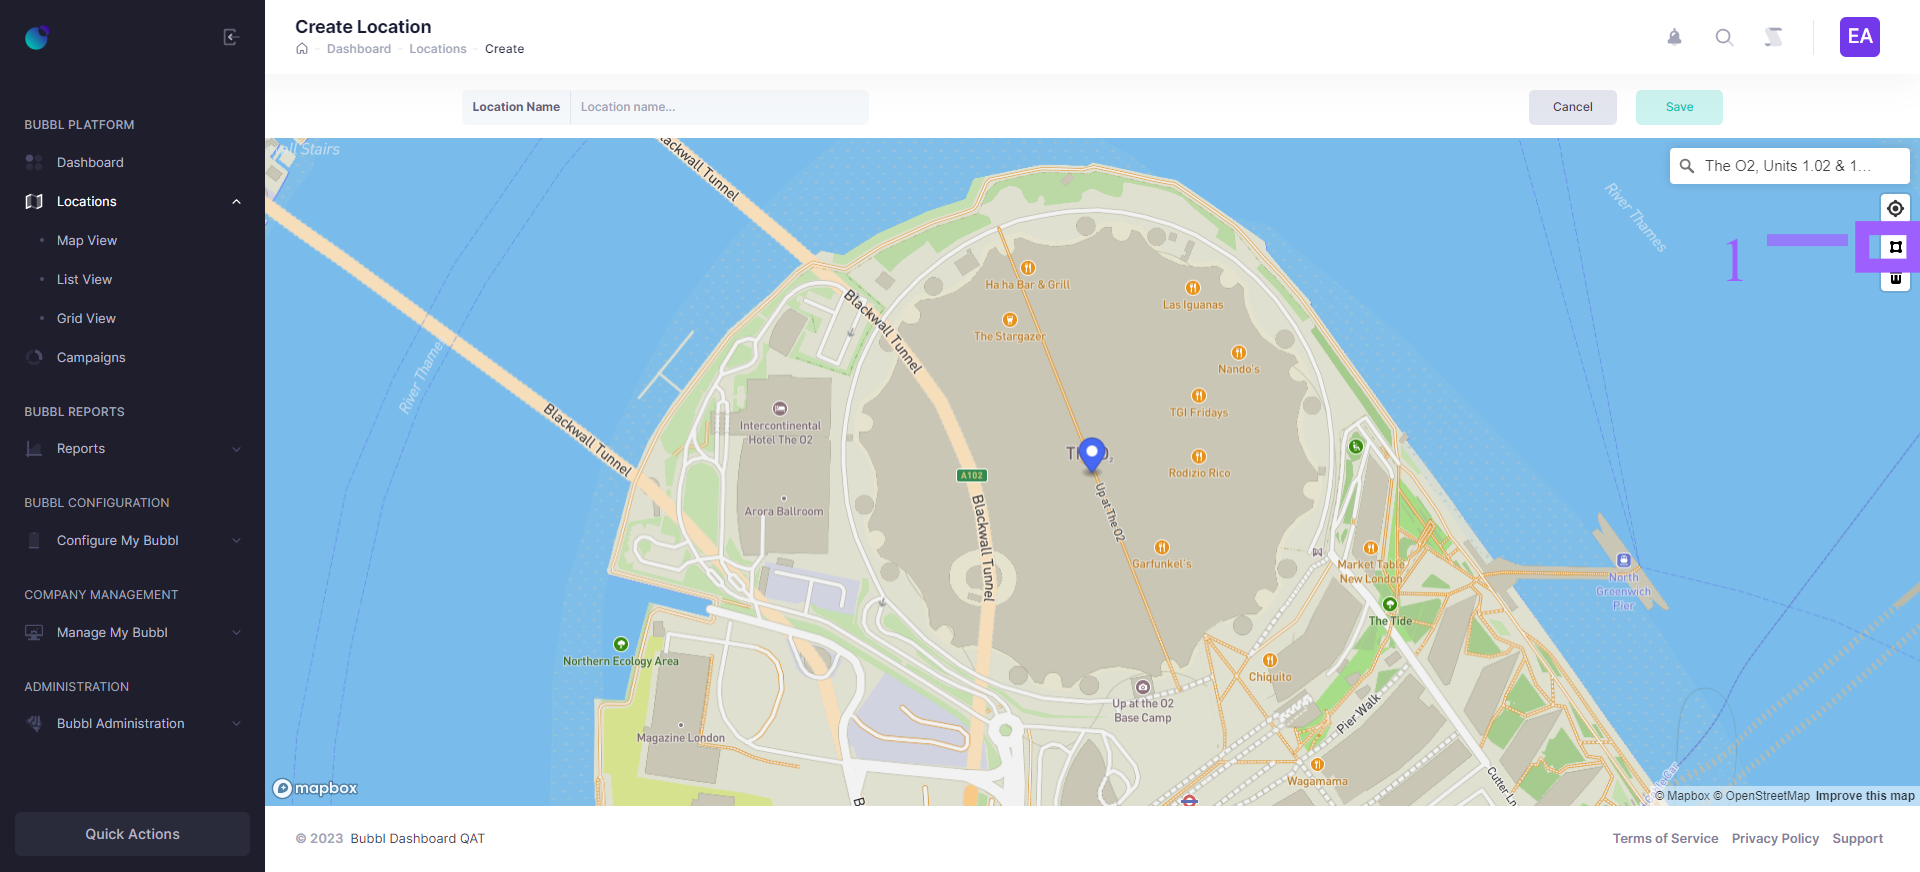
1-17 Click on a number of points of interest around your location to create your first geofence (polygon).
- A geofence (polygon) requires a minimum of 3 points to setup.
- Users typically click 4 points to create a square.
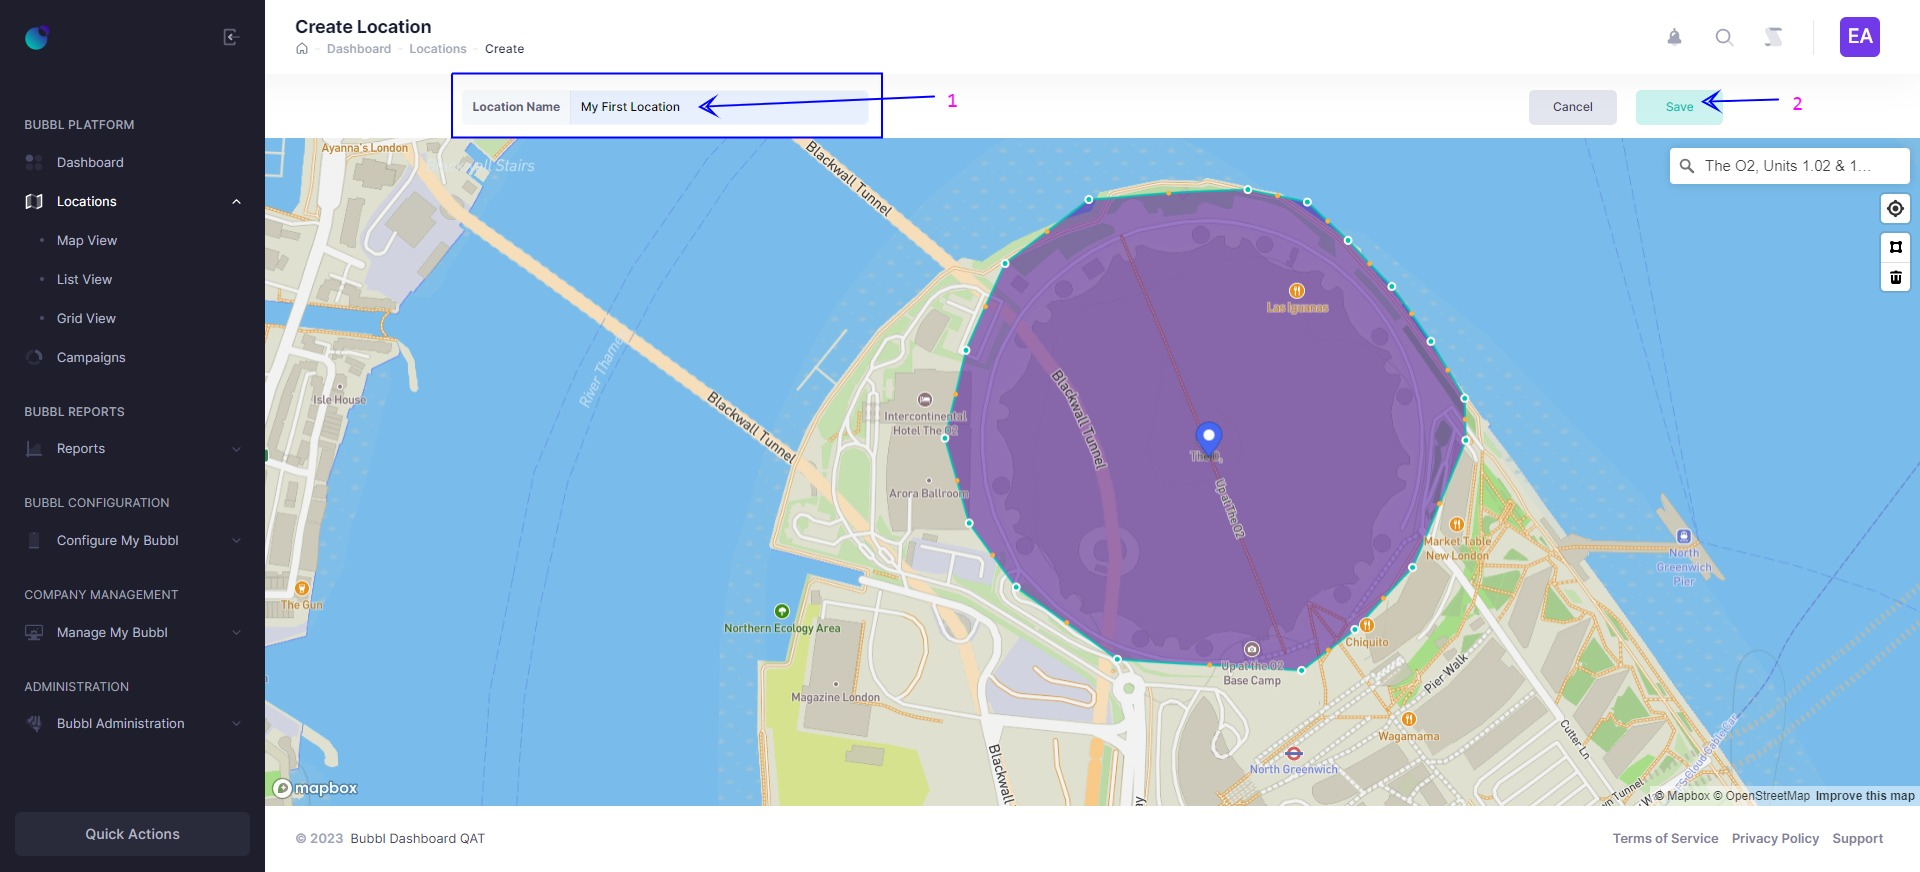
For more complex objects like the O2 Arena in this example, you can click on multiple points to define the shape.
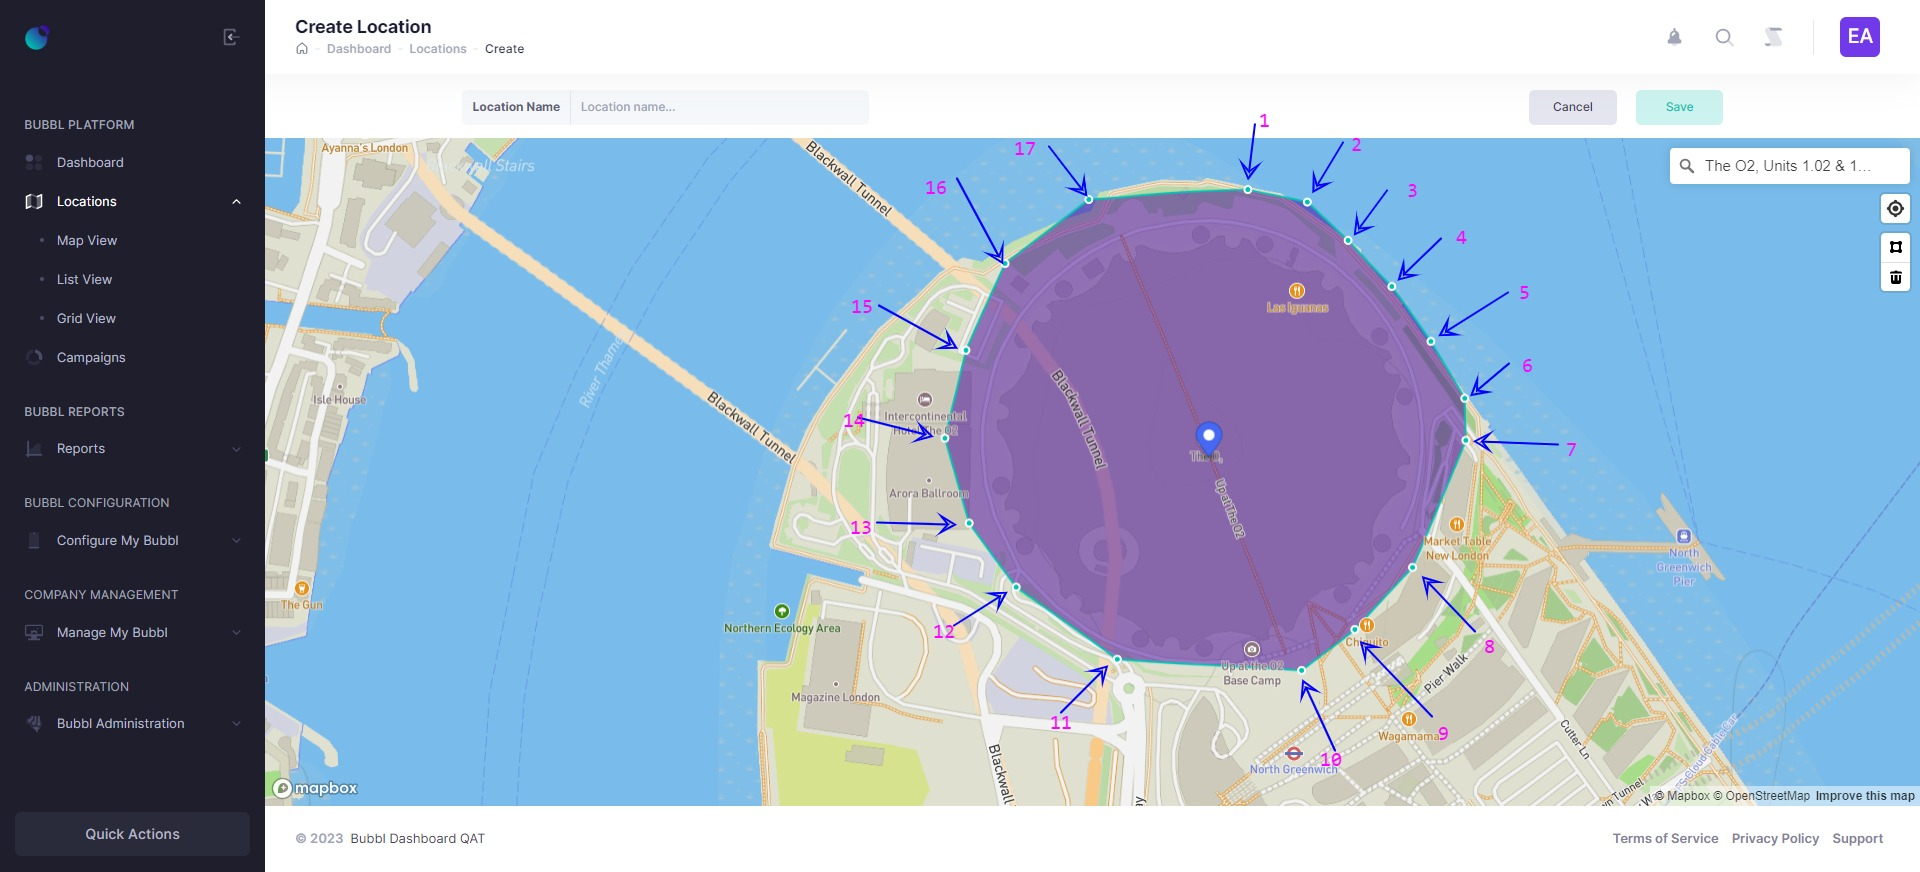
Completing your geofence
Please remember that you must return and click on the starting point to complete your geofence (polygon
Editing a location (geofence)
You can edit the size and shape of the geofence by moving your mouse over the purple geofence and double clicking inside it.
This will display additional orange dots around the edges of the geofence. Simply click and drag the points to reshape and re-size the geofence.
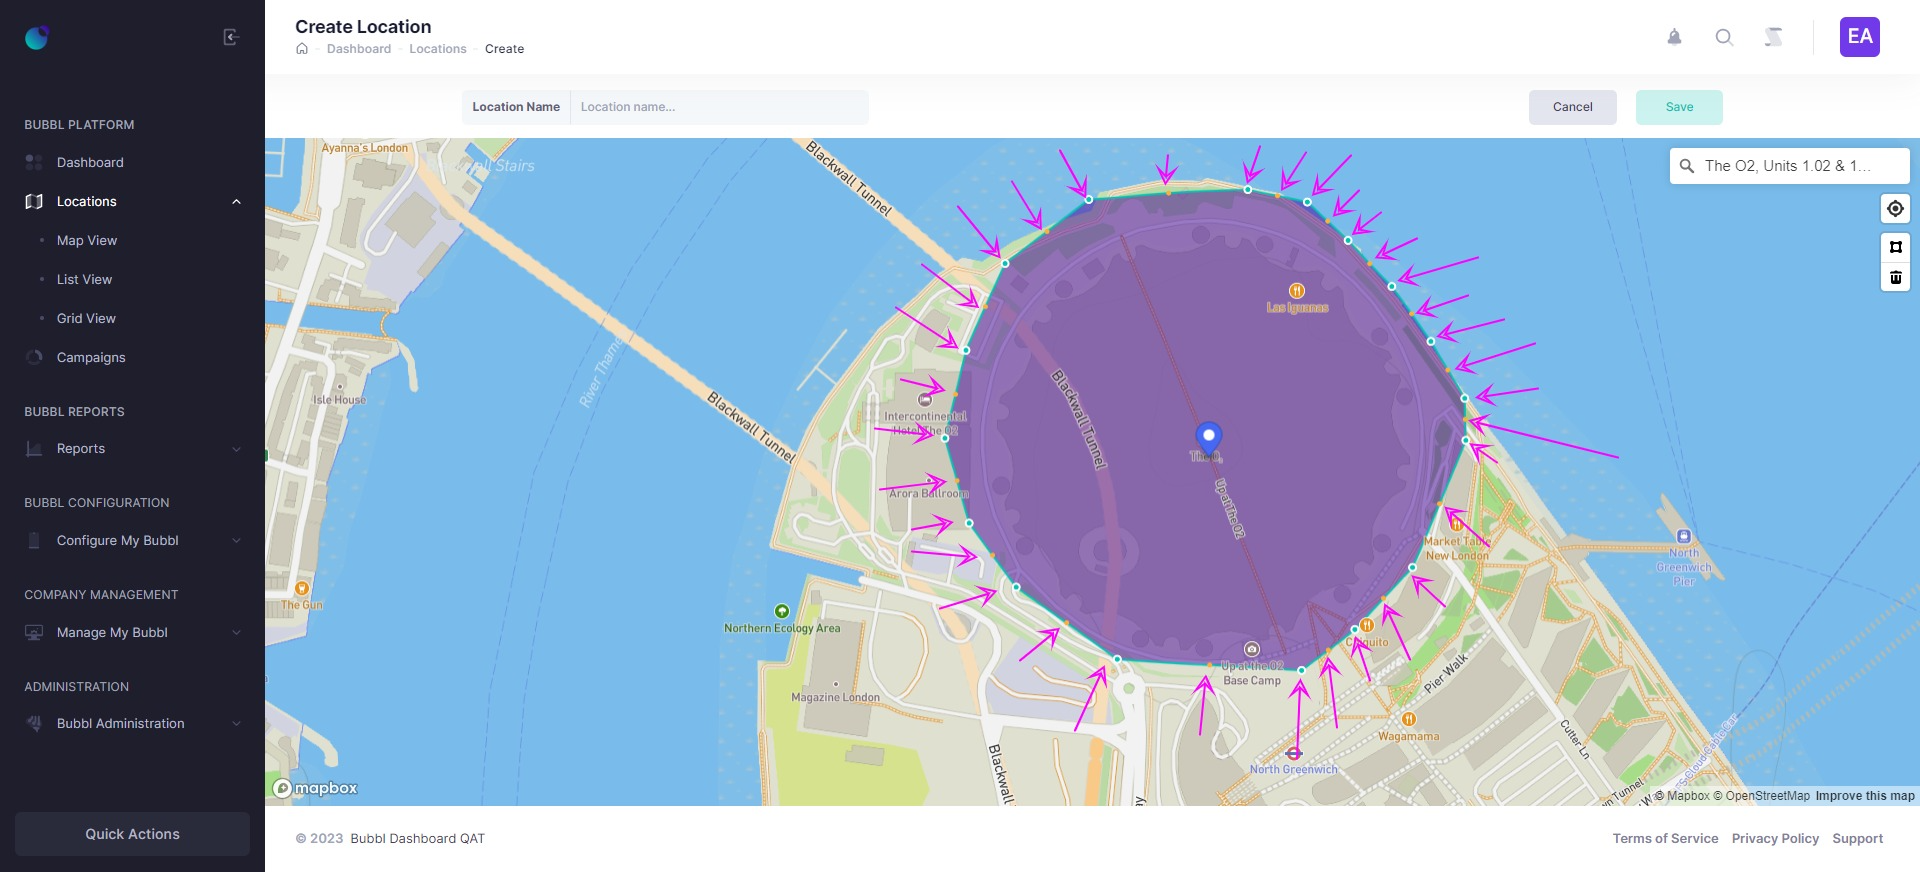
If you don’t see the points around the geofence, click anywhere inside the geofence.
If you are unhappy with the shape of the polygon you can click on the bin icon to delete your geofence.
To redraw the geofence, click the draw tool under the find my location icon. You know you are using the draw tool when your mouse cursor changes to a black cross.
Saving a location (Geofence)
Before you can save your location you are required to provide a name of your choice, once you have typed it in, click the save button to proceed.
-
Enter a name for your location in the location name text field
-
Click the save button to save the location you just created
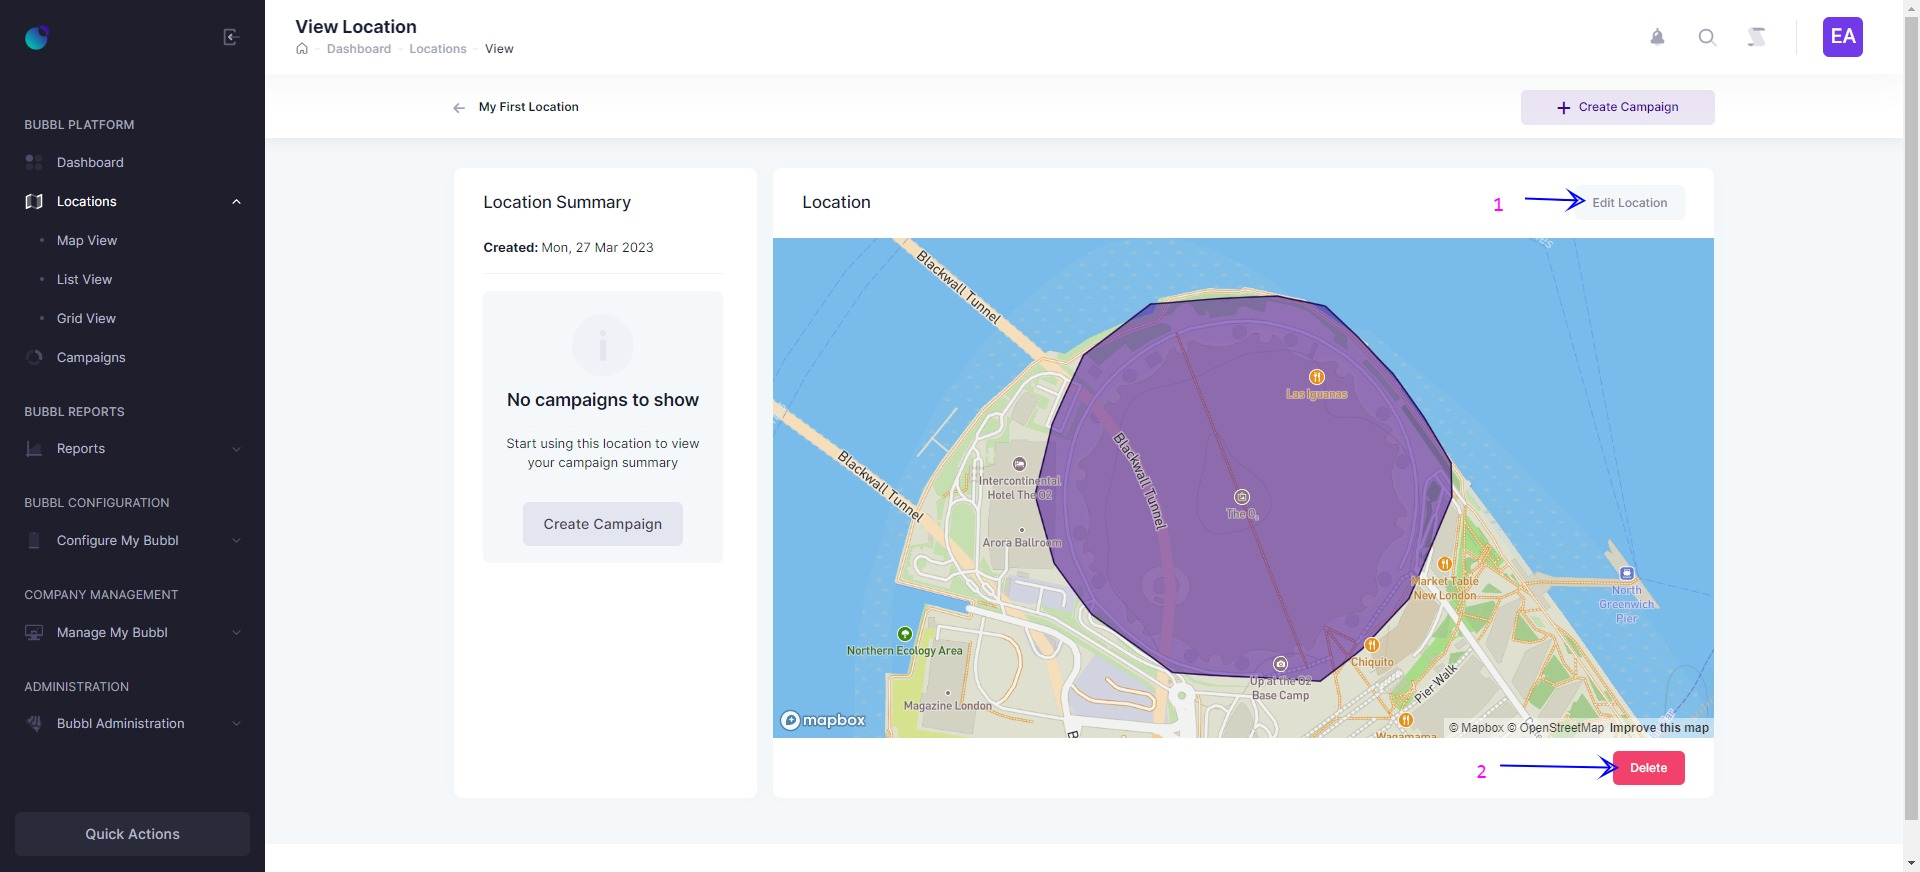
After saving the location, you will be taken to the location summary page. From here, you can choose to edit or delete your location.
- Click to edit the location
- Click to delete the location
Adding a Campaign to a Location
Continue to the next section
Updated about 2 years ago