How to create an iOS Push Notification Certificate
Also known as a .p12 file
Objective
To create a .p12 file that can be uploaded to the Bubbl Dashboard to enable push notifications to be sent through APNS to a Bubbl Enable App.
Audience
iOS App Developer
Step 1 - How to create an Apple Self Signed Certificate
You can only do this on an Apple Mac computer
Keychain Access
Open the Keychain Access by pressing Command (⌘) + Spacebar to open Spotlight.

Start typing Keychain Access and it will appear in the available list, select Keychain Access from the list. You will see a screen similar to the following:

From the Keychain Access menu select Request a Certificate From a Certificate Authority…
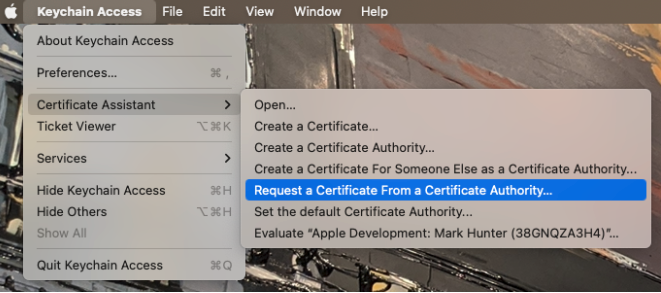
You will be presented with a screen as shown below:
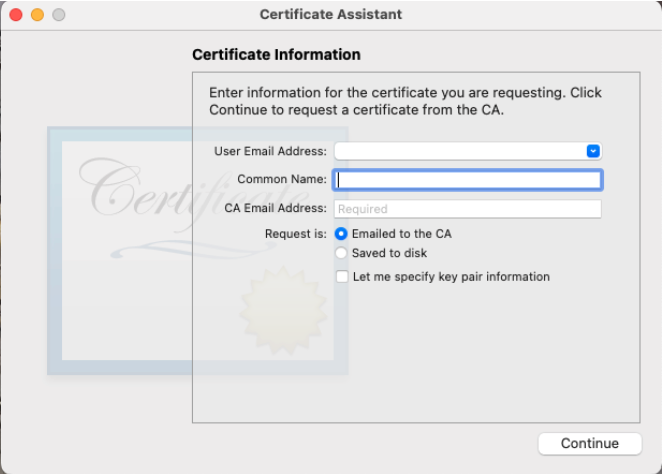
Enter the User Email Address, e.g. [email protected], and Common Name, e.g. Joe Bloggs. Then select Saved to disk and press Continue.
You will be prompted to save the file, it is useful to give the file a meaningful name, e.g. include the created date in the name such as MyAppCertificateSigningRequest.certSigningRequest.
Step 2 - Creating an Apple Push Notification Certificate
You will need an Apple Self Signed Certificate before proceeding
Generating the Certificate
Goto https://developer.apple.com and login to your account.
From the left menu select Certificates, IDs & Profiles.
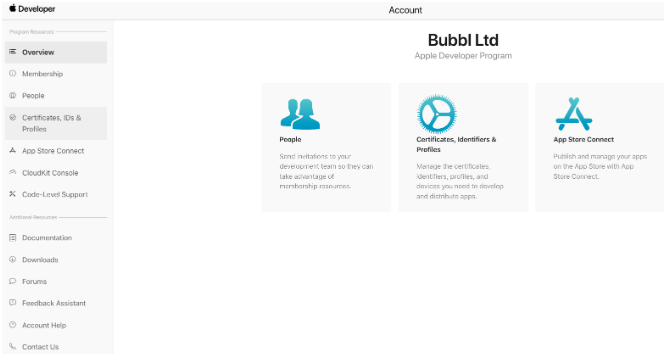
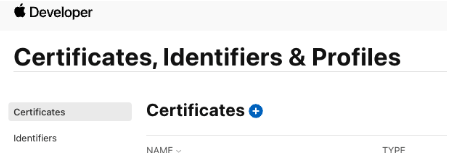
Then select + button to the right of Certificates to start adding a new certificate.
Scroll down to the list of Services and choose the radio button for
Apple Push Notification service SSL (Sandbox & Production) then scroll back to the top of the page and press Continue.
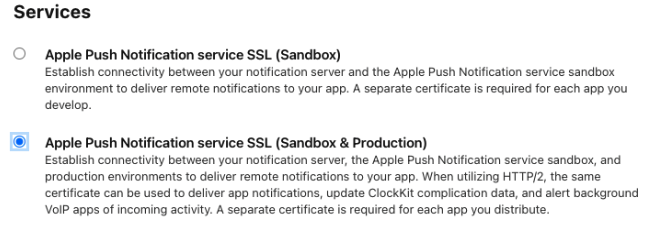
You will see a screen similar to the following:

From the dropdown list, choose the app you wish to create a Push Notification Certificate for and press Continue.

Choose a previously created CSR file or see How to create an Apple Self Signed Certificate and press Continue.
Your certificate will now have been created, the expiration date will be 365 days from the created date.

Download the Certificate, by default it will be named aps.cer, it is suggested that you rename to something more meaningful, e.g. myappaps.cer.
Double click on the downloaded Certificate file and it will now be installed in your Keychain Access list.

Step 3 - How to make a p12 file for iOS
You will need to have created and downloaded a Push Notification Certificate before proceeding
Prerequisites
You will require a
strong passwordlater in the process, we suggest that you generate this before you start and save it somewhere for retrieval later. It will be needed when updating the Bubbl Dashboard
Generating the p12 file
Open the Apple Keychain Access app and you will see something similar to the following for your previously installed push notification certificate.

Right click on the blue line marked above and select Export:
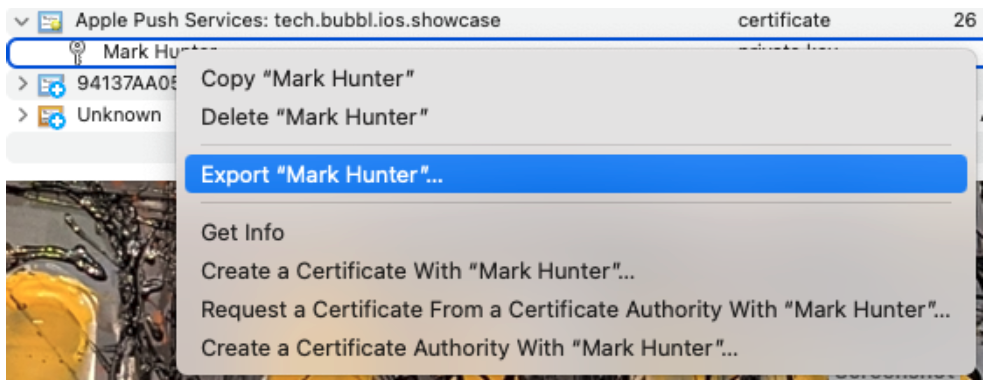
You will now be asked to save the p12 file, the default name is Certificates.p12, we suggest providing a more meaningful name, e.g. MyAppCertificatesExp.p12.
At this point you will be asked to provide a strong password, this will be needed when using the p12 file on the Bubbl Platform, so please save it somewhere.
You will then be asked to provide your password for your Keychain, once this has been provided the p12 will be saved to the location chosen.
Updated over 2 years ago